“Oh no”, I said. “I’m not doing another lockdown window this year,” I said. And then I saw this amazing free puffer fish pattern from Vanessa Mooncie, and I knew I would have to make one at some point. They’re so cute. Just look at this one being trained to recognise symbols!
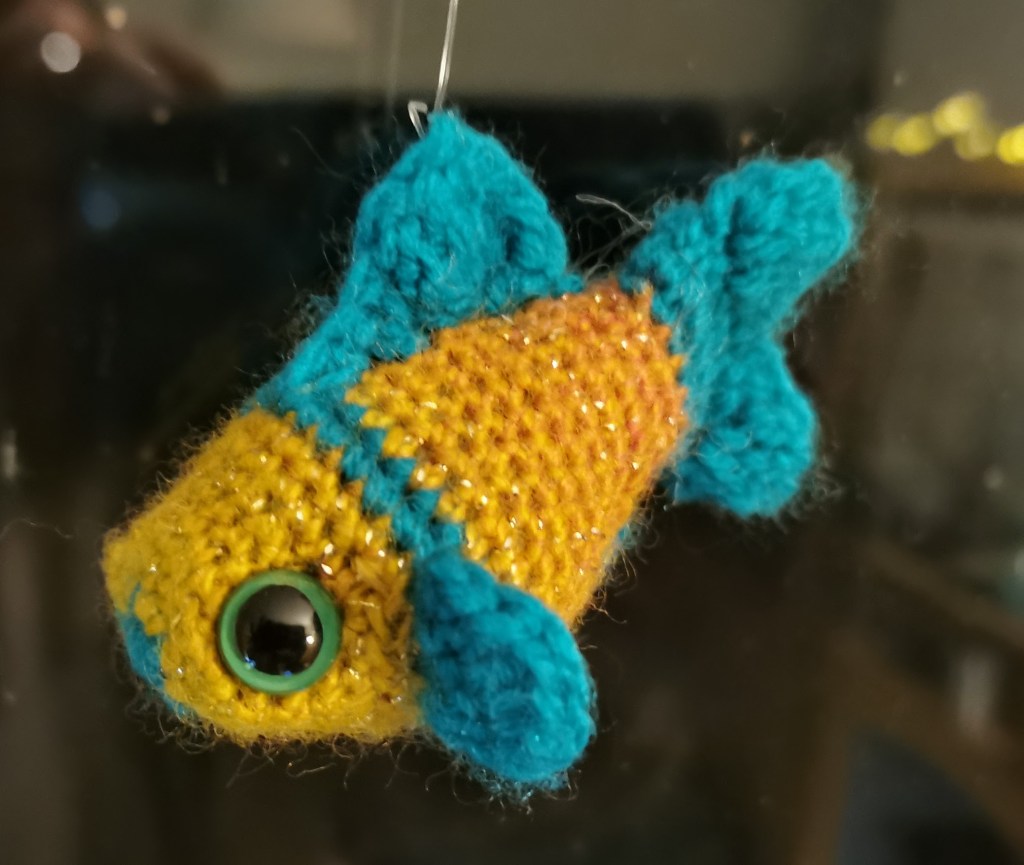
And I already had a small sparkly fish I’d made a while back (when I wanted to play with my Universe yarn from hobbii), using this pattern from from amilovesgurumi.
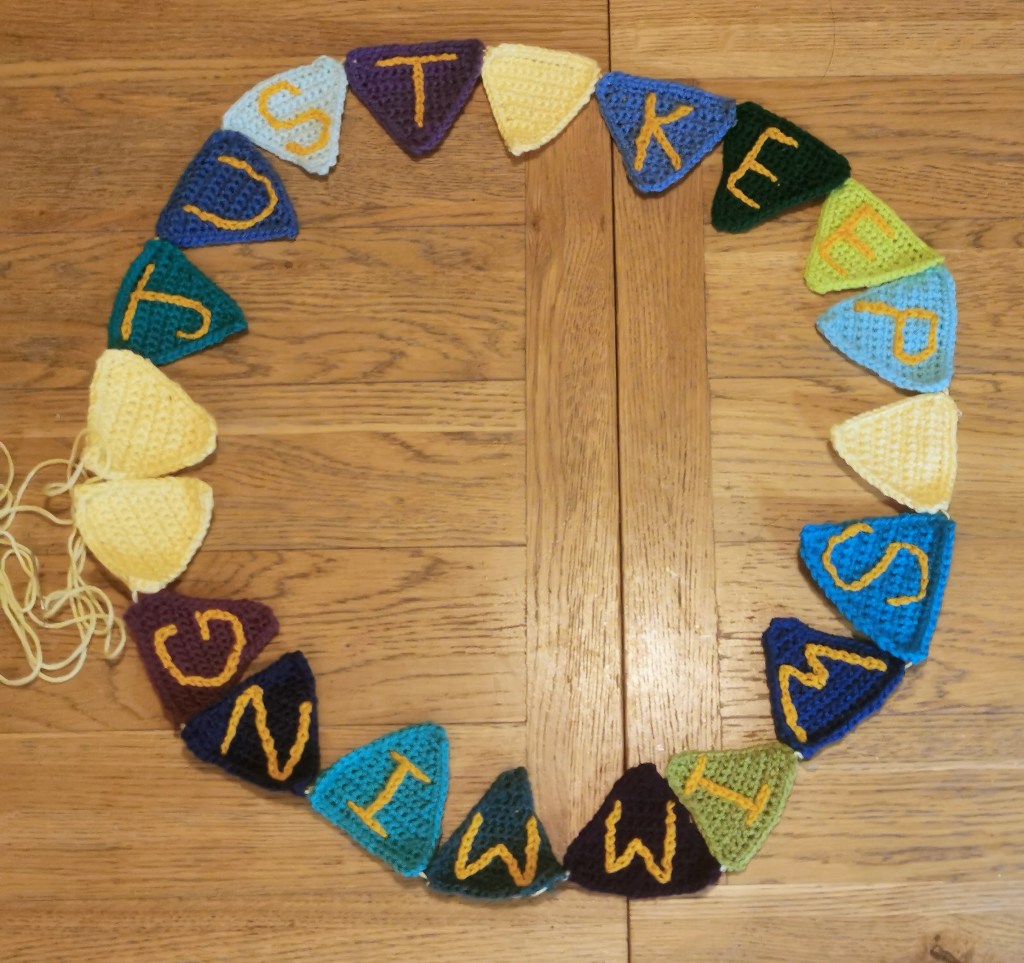
And then I thought I could use the slogan, “Just Keep Swimming,” to encourage people passing by on their government-sanctioned exercise for the day.*
As a former scuba diver, the excuse to crochet a ton of marine creature amigurumi was too good to pass up, and so it became a thing.
My goals for this display:
- Cheer up passersby (and online followers).
- Inspire other folks to have a go at making their own, crochet or otherwise.
- Work on it every day for at least an hour, life permitting.**
- Learn new tips, tricks and techniques.
- Only use free patterns so I can share them with everyone.
- Ideally get some collaboration going, although I’m not sure how yet. I will be posting on twitter and instagram with #lockdownwindow2021. If anybody else would care to join me, I’d be delighted!
*Which must be in a place less than a 5 mile drive away or you’ll get fined £200. Although it’s fine to ride your bike for 7 miles if you’re the Prime Minister. No wonder we’re all confused.
**I’m not aiming for one item a day this time, as it can take days to make a complicated amigurumi, and I have commissions to make and a shop to stock.
Days 1 – 6 (Jan 6th – 11th): Making bunting! And getting the bunting in the window.
Here’s how I do it. There are probably better ways. (UK terminology).
Gauge doesn’t matter, you just need an appropriate hook for whatever yarn you want to use. I used DK yarn with a 4mm hook.
- Chain as many as you want to get the right width for the top of your bunting triangle. Then chain one more to allow you to turn. (I used a chain of 15 +1 for turning, as I need the bunting to be small enough to fit in my window.)
- DC into the second chain from the hook, and continue with DC all the way back to the beginning of the chain. You should end up with your desired chain count. DO NOT MAKE A TURNING CHAIN.
- Turn. Skip the first stitch of the previous row, and DC to the end. This should decrease the number of stitches in your row by 1. DO NOT MAKE A TURNING CHAIN.
- Repeat the above step until you only have one stitch left in your row.
- Turn and DC into the remaining stitch.
- You can stop here, finish off and weave in your ends, or you can neaten up the edges by doing DC all around.
To do that, start with 3DC in the tip and then work down the side, with one DC into the end of each row. 3DC into the corner, and then DC along the top, working into the other side of your starting chain. If you want one less end to weave in, you can crochet over the starting tail from your yarn as you go. 3DC into the corner, and then go back down the other side with one DC into the end of each row until you are back at the tip of your triangle. Slip stitch into the first stitch and finish off.
I steam blocked my (mostly) acrylic bunting to stop it curling up. Pressed with iron set on maximum steam, damp teatowel between iron and bunting. You need to be careful with acrylic as you can denature it (melt it) if you touch it directly with the iron. You can just hover the iron a centimeter above, but I was feeling lucky, and I got away with the teatowel trick.
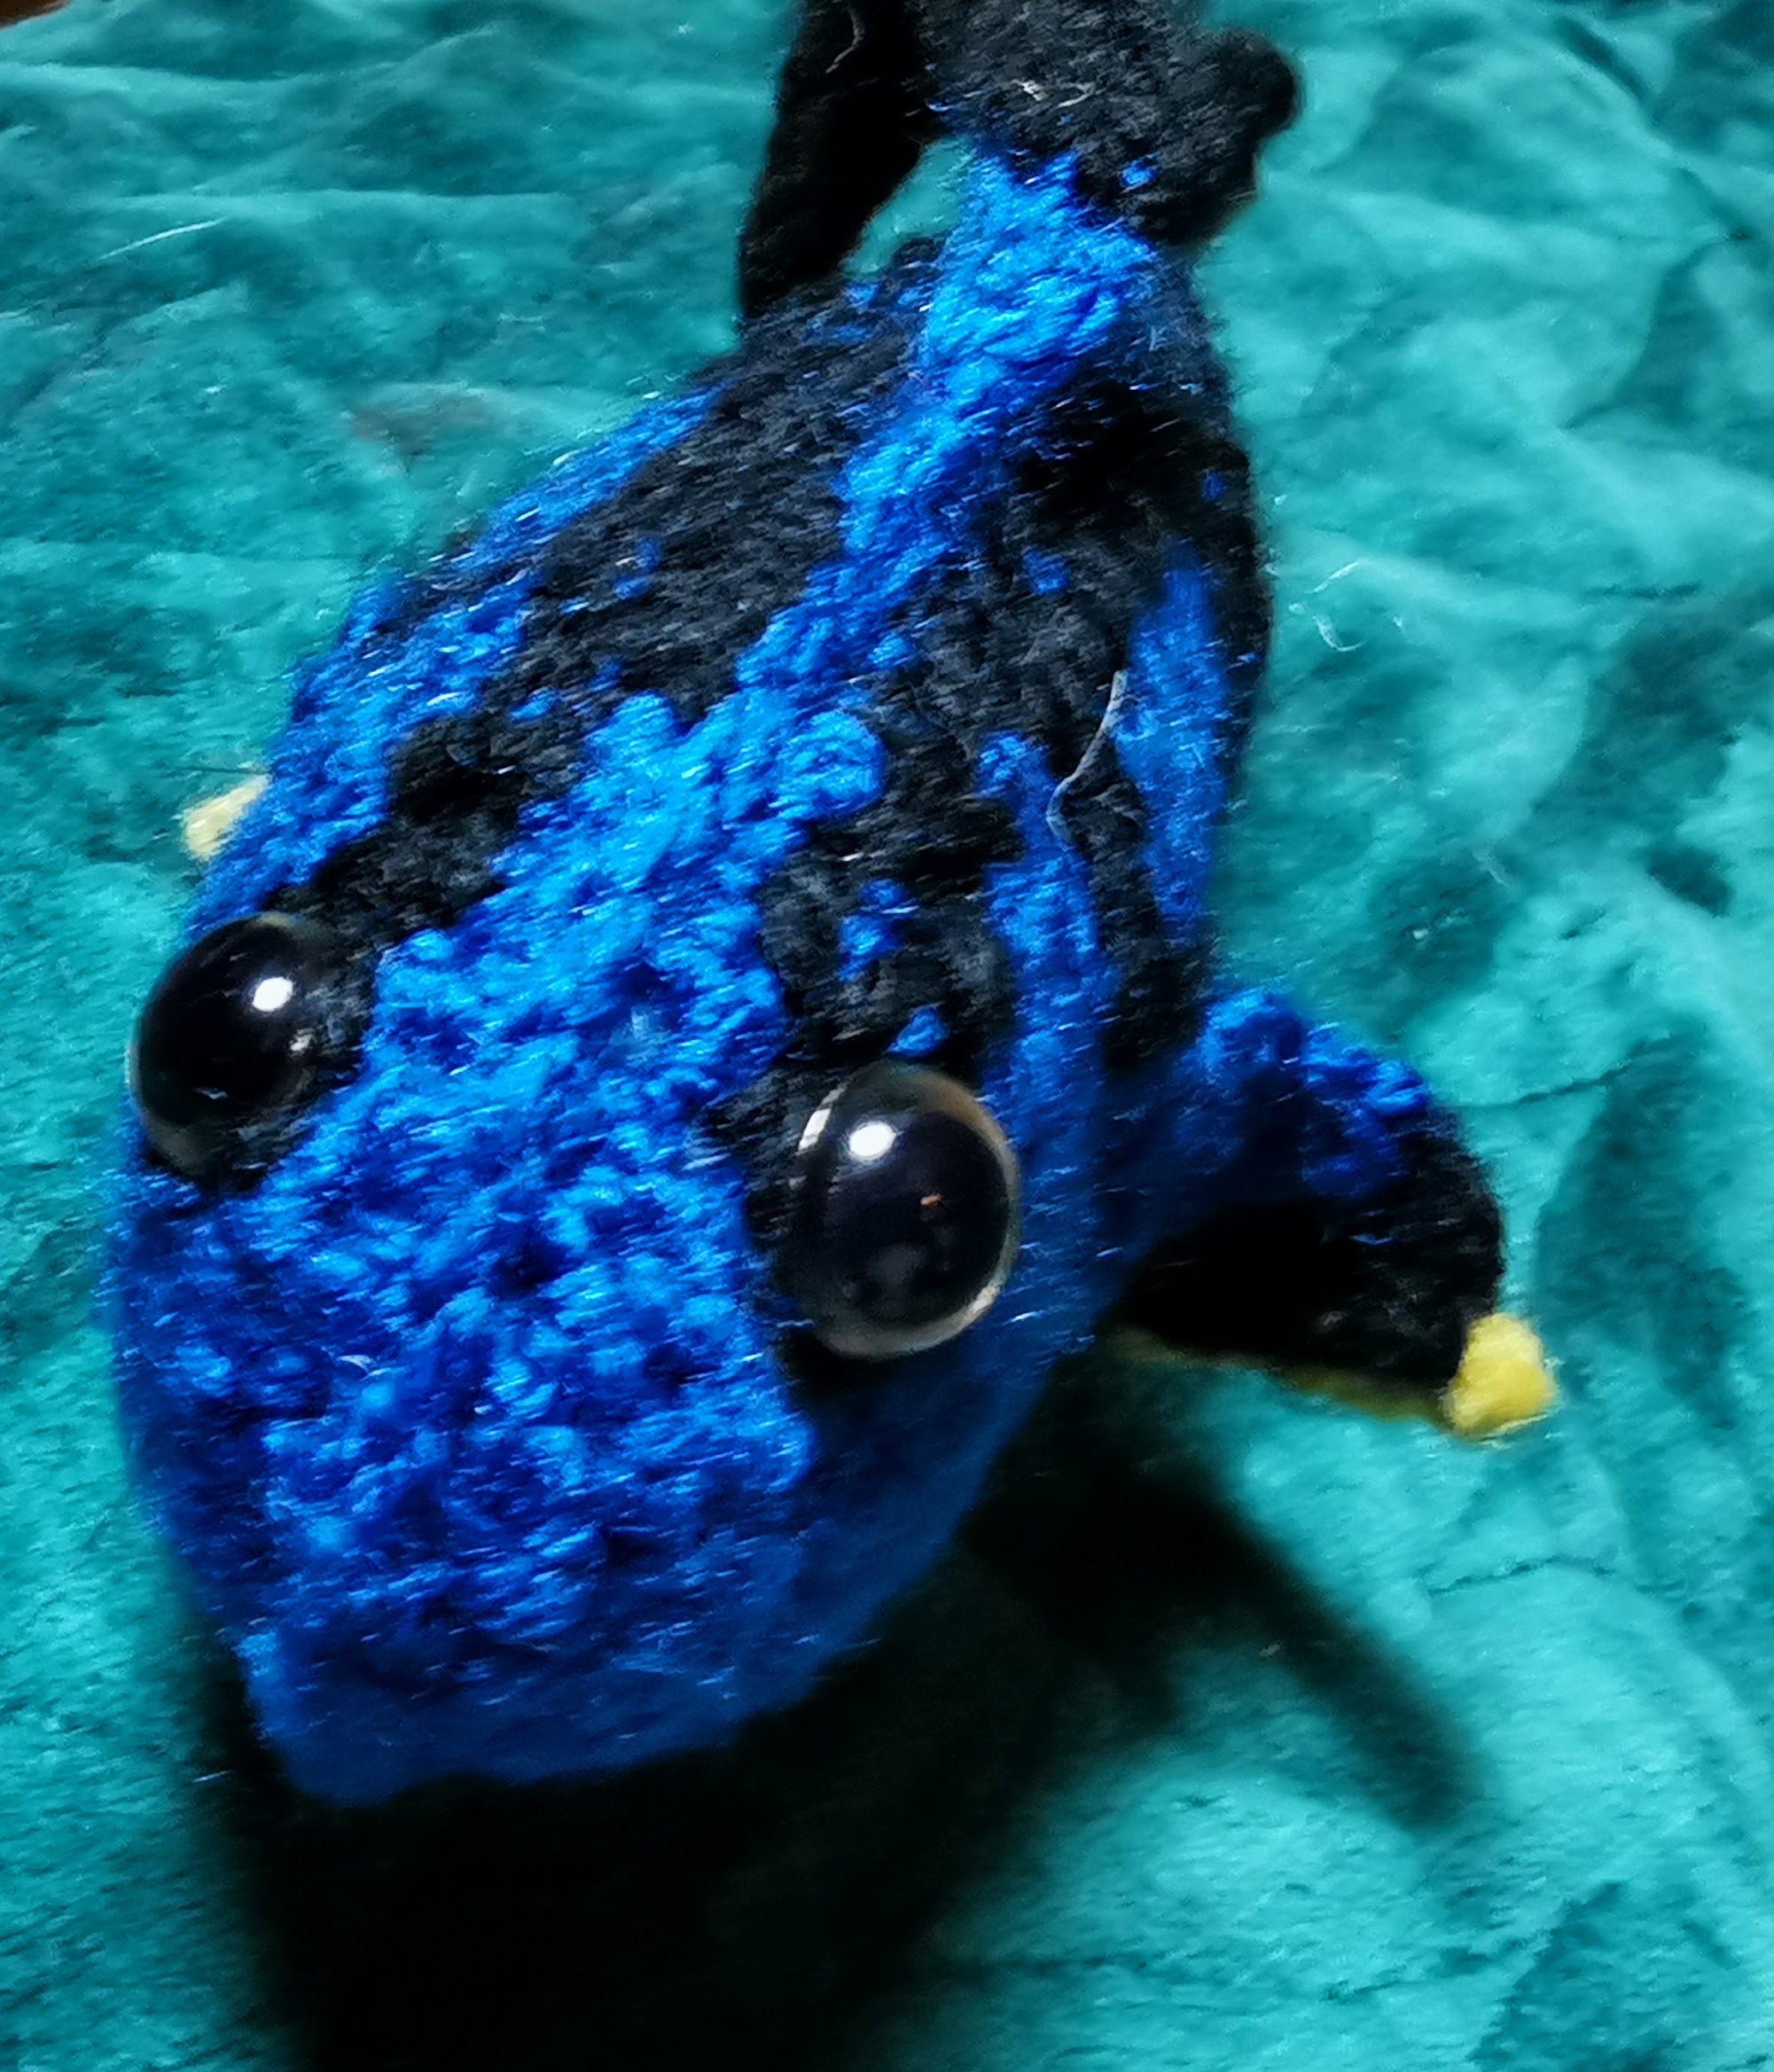
Days 7 – 10 (Jan 12th – 15th): You can’t tell everyone to just keep swimming without a Dory. This Blue Tang is made with the pattern from craftsmumship.


I got confused at a few points in this pattern.*** Here are my tips in case they help:
Yellow tail sections: When I followed the pattern as I understood it, my tail sections came out with an asymmetrical**** jog in them. I would suggest the following (using the US terminology of the pattern):
- Row 7: sc dec, sc dec, chain 1 and turn
- Row 8: sc dec, pull yarn through loop, fasten off.
Black trim on tail: I crocheted a row of black around my tail, and then another to crochet the tail together. This was definitely my bad, and has made my tail look a bit clunky. You just need to crochet together with black as instructed.
However, being the tinkerer I am, I started from the straight end of the tail, crocheted the two pieces together up the side, and then continued with a single piece around the curved top (that joins to the body). Then I flipped the tail over and repeated for the other side, starting again from the straight end and stopping when I got to the bit I’d already done.
Bottom fin: The patterns says:
Starting near the back bottom corner attach your bright blue yarn and sc 13 stitches along the the bottom edge of where you just joined the bodies.
Turn your work and do 1 sc dec, 11 sc, 2 sc in last stitch, chain 1 and turn
2 sc in the first stitch, 7 sc, 1 slip stitch
Change to black yarn, chain 1 and turn
14sc, 2sc in last stitch, chain 1 and turn
6sc, 1 slip stitch
The underlined part was where I got confused. After a bit of pondering I interpreted this as finish off the blue yarn after the last slip stitch. Then attach the black yarn at the end of the bottom fin nearest the head, chain one and work 14 stitches back towards the tail. Make the final turn and the 6 stitches. That turned out like the picture.
***As always, please assume all mistakes are mine, and not those of the generous author who has shared their work for free. I cannot state enough how grateful I am to everyone whose designs I’ve used.
****Had to google the spelling for that! Was putting the ass into asymmetrical.
I haven’t managed to get everything up in the window yet. My brain wandered off onto ideas about how to turn my entire sitting room bay window into a crochet aquarium and still be able to 1) pull the curtains and 2) sit on the sofa. I could do with a bit more space, really. I wonder if there’s a way to use an empty shop…
Pattern list:
- Small sparkly fish made using pattern from from amilovesgurumi (US).
- Bunting “pattern”, see above (UK).
- Blue Tang/Dory pattern from craftsmumship (US).

2 thoughts on “Just Keep Swimming 2021 Days 1 – 10”